The world of gardening and agriculture has been changing at a rapid pace in recent years. With the development of new technology, things are only going to get faster from here on out! One example is how people have begun growing microgreens indoors using LED grow lights which provide more light than traditional fluorescent bulbs while also being safer for your plants and kinder to your wallet. After all, we’re invested in making money-conscious and environmentally friendly decisions.
Growing microgreens at home is easy! All you need is some light, water, soil, seeds, and containers to plant your microgreens. In this post, we will cover everything you need to know: what are microgreens, how to grow microgreens indoors, which microgreens are best for beginners, etc.
Table of Contents
What You Will Need To Grow Microgreens
- A light source – LED grow lights work best for growing microgreens indoors.
- Soil – a combination of peat moss, perlite, vermiculite, or coconut coir in equal proportions will do the trick!
- Microgreen seeds – any type of microgreens seeds can be used.
- Water
- Container
Check out some of our recommended kits (ranked & reviewed) that give you everything you need to grow microgreens at home.
How to Grow Microgreens Indoors (With Soil)?
Step One:
Choose your growing container. These are typically made of plastic, terra cotta, or wood and come in a variety of shapes and sizes.
Step Two:
Prepare the soil by adding water to it before filling up your chosen growing container with potting mix – this will help moisten the root zone where you’ll be planting your microgreens seeds.
Mix peat moss, perlite, vermiculite, or coconut coir together until they’re mixed well without any lumps (the ratio should always be equal).
Fill up the pot with soil about two centimeters deep then cover that layer of dirt with another inch-thick layer of dampened sphagnum moss or a damp paper towel.
Step Three:
Next, plant your microgreen seeds – how deep you should do this will depend on how big the seed is.
When planting microgreens that are around half an inch in diameter or smaller, just press them gently into the dirt and make sure they’re not too close to one another (about six inches apart).
Larger seeds, like basil, need to be pierced with tweezers then pressed halfway into the soil before being covered completely with more potting mix so only their tip remains exposed from the surface of the soil.
Wait about three days before watering again!
How to Grow Microgreens Indoors in Water (Without Soil)?
Hydroponic microgreens are types of seedlings grown without soil or other organic matter. They’re typically grown in water to which nutrients have been added and their roots will often be suspended so they can’t come into contact with the nutrient-rich solution below them.
Step One:
Choose your preferred container for growing hydroponics, like one made out of plastic, glass, or clay; then punch drainage holes on the bottom before lining it up two inches deep with gravel.
Step Two:
Fill halfway full with hydroton pellets (these are clay pellets that can hold up to 20 times their weight in water) or perlite (a white, light-weight rock).
Step Three:
Fill the rest of the container with your preferred potting mix and then plant your seeds!
If hydroponic microgreens feel right for you, check out some recommended kits.
Useful Tips To Grow Microgreens Indoors
![]()
![]()
![]()
![]() Don’t forget sunlight!
Don’t forget sunlight!
It’s important to note how much sunlight your chosen growing container receives per day.
If you want your plants to be tall but spindly with lots of leaves then it’s best if there isn’t too much sunlight – these types like “cooler” temperatures so make sure the area where you’re planting them doesn’t get more than six hours of direct sunlight per day.
For shorter plants that have a bushy look and dense growth, it’s best to give them at least six hours of direct sunlight per day.
Select the perfect container for your microgreens
Choose one with drainage holes in the bottom, a wide top opening for you to easily water or harvest microgreens as needed. Make sure there’s also enough room inside so that all of your plants are spaced apart and have plenty of space to grow!
Fertilize regularly
A great way to keep your plants healthy is by fertilizing them regularly. To do this, just add a handful of compost or well-rotted manure into the soil every time you water and mix it in with a trowel to make sure all the nutrients are distributed evenly.
Harvest regularly
It’s best to harvest microgreens when they’re about four weeks old – otherwise, you’ll start getting a bitter taste and more mature leaves will eventually yellow.
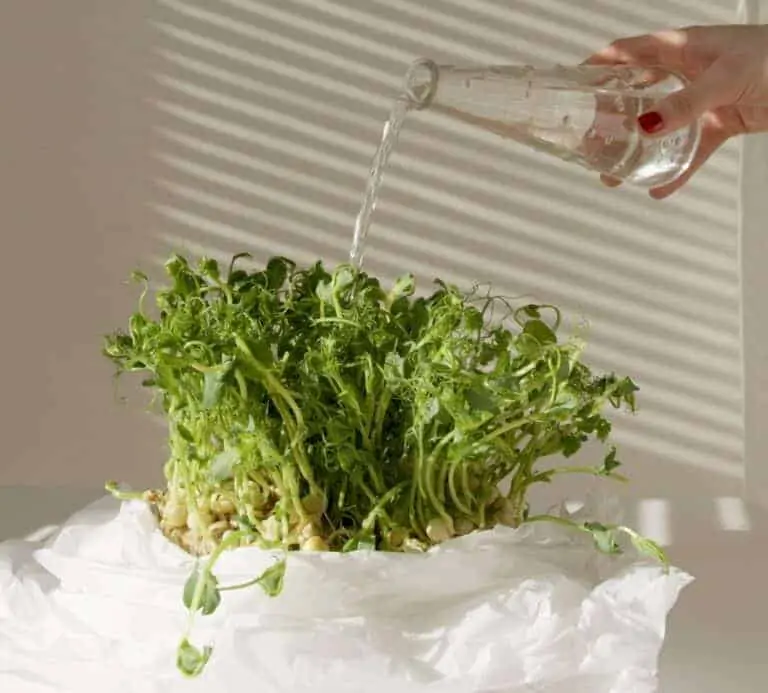
Water every 3 days
It’s important to water your plants regularly – how frequently this needs to happen will depend on the type of microgreens you’re growing. Generally, a good rule of thumb is that you’ll need to be watering them once every three days.
Be patient
Keep in mind that it takes about three days for seedlings to show their first sign of life (green leaves) and another two weeks until they grow into full maturity. For this reason, make sure you sow at least six seeds per square foot so there are enough potential survivors if any die-off during germination!
Impact On Your Wallet
Growing microgreens at home is a great way to save money while staying healthy. Although it might take some time for them to grow, you’ll be rewarded with fresh greens that are much cheaper than what you can find in the grocery store.
You also won’t have any issues with pests and diseases as long as your plants are grown organically!
Ready to get started? Check out our recommended kits (ranked & reviewed) for growing microgreens at home.
FAQs
What Are Microgreens?
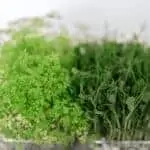
Microgreens, also called baby greens, are an herbaceous crop harvested between the time it starts to grow leaves and when it reaches a full-sized plant. These plants are rich in nutrients and have been shown to contain more vitamins, minerals, and antioxidants than their fully-grown counterparts. Microgreens can be eaten raw or cooked – they add complexity to salads and sauces as well!
How Long Does It Take To Grow Microgreens?
What is also great about growing microgreens is that their short lifespan means less time in between plantings which can allow a farmer or gardener to produce much more food over the course of a season.
You can harvest your microgreens within two weeks after germination which means you get more from your garden without having it take up space for months. As long as there is enough light, soil nutrients, water, and adequate temperature, a microgreen will grow.
Microgreens are harvested when they’re the same height as their parent plant – usually between two to six inches tall. This is called “seedling” or “true leafy greens.” Microgreens that have been grown for more than six weeks will be taller and greener which means you should harvest them before this point to get the most out of your plants!
What Are Microgreens Good For?
Microgreens have been shown to be about 100 times more nutritious than typical vegetables. They contain essential vitamins and minerals that our bodies need, and because they’re so small, it’s easier to eat them! If you want the benefits of eating microgreens but don’t like greens then these might be perfect for you – try adding some chopped up parsley or green onion on your next salad at lunch.
What are the Easiest & Best Microgreens to Grow Indoors?
The easiest and best microgreens for beginners are garlic mustard greens, red Russian kale, and dill – all because they grow in a shorter time period than others!
Harder types for beginners include arugula and snow peas which take longer to grow but produce high yields when done right. If you’re just starting out with growing your own food then these three veggies can be the perfect introduction into how farming works without being too overwhelming.
Microgreens don’t need much light exposure to thrive; however, if their leaves start getting thin or pale green it means there isn’t enough sun coming through so it’s important that you plant them in an area with some sunlight.
There’s always the risk of pests and fungus in your garden – to combat this, it’s best to set up a perimeter around your plants that will ward off any snakes or animals thinking about munching on them! It doesn’t have to be anything too complicated; just a string line can work for now until you are more experienced in growing food outside.
What Microgreens Should You Grow?
The most popular microgreen is arugula because they have such a peppery taste! Arugula leaves also grow very quickly so if you’re looking for something easy but relatively quick then these might be right up your alley. Other types like green onion or cilantro require less light exposure than arugula so they are more suitable for beginners.
Some other popular microgreens to grow include green onion, parsley, basil, and cilantro.
Green Onion Microgreen: If you want long leaves that might get a little spindly but are still flavorful then this is the type for you! The plant will usually only take about two weeks to produce so it’s perfect if your goal is something quick – just make sure not too much direct sunlight or heat gets on them because they tend to burn quickly.
Parsley Microgreens: This type doesn’t need as much water since it grows in tighter bunches which means less wilting due to lack of moisture; however, if there isn’t enough light exposure then these won’t do well either.
Basil Microgreens: If you want a plant that has a more intense flavor then basil is the way to go. It takes about six weeks for them to grow but don’t worry! You’ll have them pretty much the whole summer long so you won’t need to plant more than one basil type at a time.
Cilantro Microgreens: This type is a little more finicky than the others – it needs about six hours of sunlight, low heat, and a lot of space. The taste is less intense than basil – just make sure you have the right conditions before planting them.
Which Microgreens Are Harder To Grow Indoors?
Snow peas: Because snow peas require a lot of light exposure and moisture to stay green, you should try these out with someone who has some experience growing them before going at it alone! Their leaves will start turning pale in color if there isn’t enough sunlight or water around the plant which is something to keep an eye on as time goes on.
Arugula: Arugula plants can grow tall but do not produce much foliage when compared to other microgreens like kale; this might be discouraging for new gardeners.
Dill: Dill requires about six hours of direct sunlight per day otherwise their leaves will wilt and turn yellow; they are also a type of microgreen that takes longer to grow.
Conclusion
Growing microgreens at home is a great way to eat nutritious, tasty food! You don’t need much space or money to start with your first crop and it’s an easy way to get started if you’re just starting out gardening.
Microgreens are low in calories (about 30-40 per serving), high in protein (more than spinach!), and most importantly they taste good too – so how could you say no? They also tend to be cheaper than buying from the store so it’s one more reason why growing them yourself might save some cash on top of all these other perks.