Leftover food and yard waste make up more than 30% of residential trash, despite being biodegradable and beneficial to soil and plants. Composting works by speeding up the natural decay process. While all the organic matter that we throw away will decompose, items in a landfill are packed too tightly together for sufficient airflow to break down. That leads to anaerobic decomposition, which creates significant amounts of methane gas. Methane gas is more than 25 times as powerful as carbon dioxide when it comes to trapping greenhouse gases in the Earth’s atmosphere.
By providing ideal conditions for decomposing organisms to thrive, home composting is faster than traditional hands-off methods and leaves behind nutrient-rich soil that can help microgreens, fruits & vegetables in indoor gardens, flowers, and trees to grow. And unlike artificial or natural fertilizers, backyard compost is free, plentiful, and comes without any additional packaging or chemicals. The process involves separating compostable materials from other garbage and then aerating them in oxygen-rich containers or piles that are turned, watered, and finally added to garden beds or around any number of plants.
Composting can be achieved with the help of worms, black soldier fly larvae, fenced-in piles in your yard, or in rotating tumblers from your local hardware store. Those without space for compost can save food scraps in bins under the sink or in the freezer to be donated to a local community garden. Whether you live in the city or country, a house or apartment, and with or without a backyard, keep reading to discover how you can get started composting at home.

Canva
Identify a space for a backyard compost or a neighborhood dropoff location
It’s essential right out of the gate to pick a good location for your compost bin—or, if you don’t have a yard, to determine where you will deliver the organic matter you collect.
Since compost piles and bins are likely to smell some of the time and attract insects or other wildlife, it’s important to have your compost decomposing in a tumbler, tiered bin system, or fenced-in pile well away from an open window of your house. Flat ground with good drainage is essential for any runoff (do not situate your compost area directly alongside a body of water—be mindful of buffers).
An area that receives regular sunlight is ideal, as the heat will help to speed decomposition. Convenience is also key; since you’ll have to take your food scraps out there at least weekly, you’ll want easy access. It’s worth considering placement that is within the same area composted soil will end up, like the back corner of a garden or on the far edge of your yard where you might be planting some trees.
If you don’t have a yard for compost, be sure to arrange where the compost will get dropped off. Some cities now offer compost pickup—but most local farms and community gardens welcome regular food scrap and yard waste dropoffs.

Canva
Decide which method is best for you
Once you know where you’ll process your compost, you can determine the best composting method to suit your needs and lifestyle.
The most common is open-air composting, which is just what it sounds like: creating a pile with food scraps and other biodegradable matter that is regularly turned or rotated. Direct compost is similar except that instead of a specific pile, biodegradable materials gets added directly to the ground (either around plants or trees or put into holes); in this method, it’s recommended only fruit and vegetable scraps be used (no meat or dairy products) so animals are less likely to dig into it. Fences are also highly recommended if you have dogs or other animals regularly in the yard.
Some other methods of composting involve vermicompost (which involves worms), tiered compost, the utilization of black soldier fly larvae, and compost tumblers that can be spun every time food or yard waste is added. For those who are composting indoors, vermicompost and Effective Microorganisms—a mixture of microbes that will help break down your organic matter—composting are both popular options. Adding bokashi, a type of fermented organic matter, to your food waste is the most common system using EMs.

lomiso // Shutterstock
Know the difference between brown vs. green items
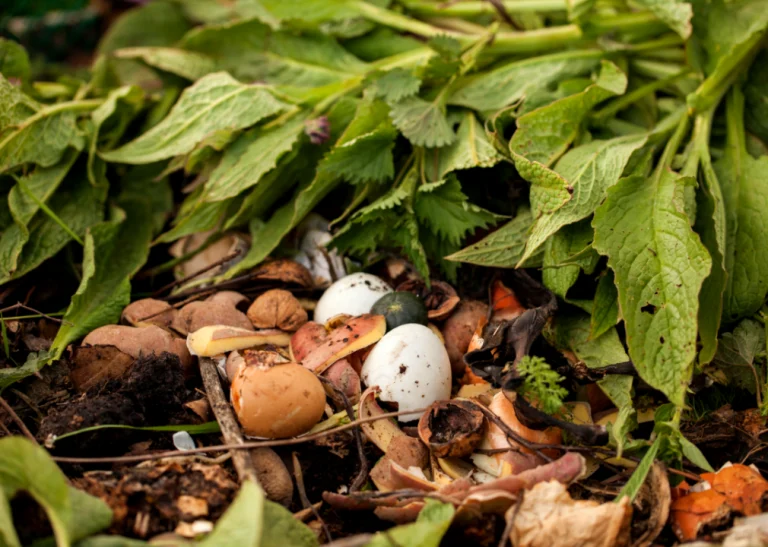
It’s important to have a balance of green and brown items in your compost pile—a ratio of 4 to 1 green-to-brown ratio is ideal. Green items are the leftover food scraps that come out of your kitchen like wilted lettuce leaves, broccoli stalks, and apple cores. However, when you only put food scraps in, it’s easy to get nitrogen-heavy compost, which can heat up too quickly.
A good way to balance a backyard compost is to add brown items—shredded brown paper bags, sawdust, cardboard, strips of newspaper, dead leaves, and other dried plant matter like corn stalks. These items are carbon-rich and serve as food sources for soil-dwelling organisms that work with microbes to break down the contents in the compost. They also add reduce any smells and lower bulk, which helps air filter through the compost pile.

Canva
Avoid composting items that can attract vermin
No one wants rats, flies, or other critters getting into your compost.
To avoid vermin, you can keep dairy and meat products out of your pile. You can also utilize bins or tumblers, which will keep organic waste off the ground and enclosed, or chicken coop fencing to keep animals at bay.
Keeping compost moist can also deter animals from seeking a dry refuge. Turning compost with a shovel or rake regularly ensures plenty of oxygen to help speed up the decomposition process—turning will also break up any potential nests.

Canva
Find the right storage for your scraps
Of course, depending on what your house or apartment is like, daily trips to the compost pile or community garden may not be realistic. In virtually all compost setups involving food scraps, it’s essential to have a storage container in the kitchen that you empty out at least every week.
Storage bins can take the form of a container with a tight-fitting lid kept under the sink, a bowl on the kitchen counter (if emptied daily), or a store-bought compost container with filter and air vents. If cleaning out a just-emptied compost container isn’t your thing, there are biodegradable, compostable bags that can be tossed out with your compost.

Canva
Compost items beyond food scraps
You can compost a number of things beyond food scraps. Garden trimmings, hay, and straw can be composted. So can shredded newspaper and uncoated paper. You can also compost sawdust and wood chips.
Biodegradable straws and toothbrushes, to-go boxes, shredded junk mail, and even what you sweep up off the floor can all be composted. Human and pet hair are also fit for your compost pile.

Christine Norton Photo // Shutterstock
Take your compost’s temperature
As compost breaks down, it produces heat. And the more heat, the faster the decomposition. The ideal temperature for the center of a pile of compost is between 135 and 160 degrees Fahrenheit. In this range, you maintain good bacteria while maximizing the pile’s efficiency. Too hot and you stand to kill the good bacteria; too cold and you’re likely to attract parasites and flies.
You can check the temperature of your compost by putting a finger into its center to gauge its warmth, buy a compost thermometer, or turn it regularly to ensure aeration and heat distribution. Compost that’s warm enough will show significant decomposition over the course of a few months at a minimum.

larisa Stefanjuk // Shutterstock
Turn the compost frequently
To get enough heat and air to your compost, you need to turn it regularly. In a tumbler setup, turning can occur every time you deliver organic matter to it. Tiered systems get left alone as new tiers or piles are added and finally raked out or flipped; other setups can be raked every few months.
Bringing materials at the edges of a compost collection to the center oxygenates the pile. This aeration will also help keep odors at bay. With any new compost pile, be sure to wait at least two weeks before turning for the first time. This allows the pile to heat up at the center and decompose.

Jurga Jot // Shutterstock
Pay attention to hydration levels
It is also important to pay attention to the amount of water you have in your compost pile.
Water helps with keeping the temperature of the pile regulated and it also helps with decomposition. If you have too much water, the pile might decompose too quickly and smell; not enough water, and the compost may not break down quickly enough.
Compost piles should be between 40% and 60% water. The best way to know if you have a good level of water is to take a handful of compost and squeeze it. If no water comes out, the pile is too dry. If water gushes out, the pile is too wet. It should feel like a wet sponge that has been wrung out.

Canva
Look for dark, crumbly soil after a few months
Once you have picked your location, your container, added a mix of green and brown, turned your pile, and maintained good levels of hydration, soon you will have wonderful, nutrient-rich compost you can use in your garden. So how do you know when it’s ready?
The amount of time it takes for compost to be ready depends on a number of factors, some of which have already been discussed, like the location of your bin, how frequently you turn it, what you put in it, and what kind of bin you use. It also depends on how big the pile is. However, your compost likely won’t be ready for a few months. To see if it is ready, you can look at its color and texture; it should be dark, crumbly soil that is free of any offensive odors.
This story originally appeared on Pela and was produced and distributed in partnership with Stacker Studio.
Featured Image Credit: Canva.
